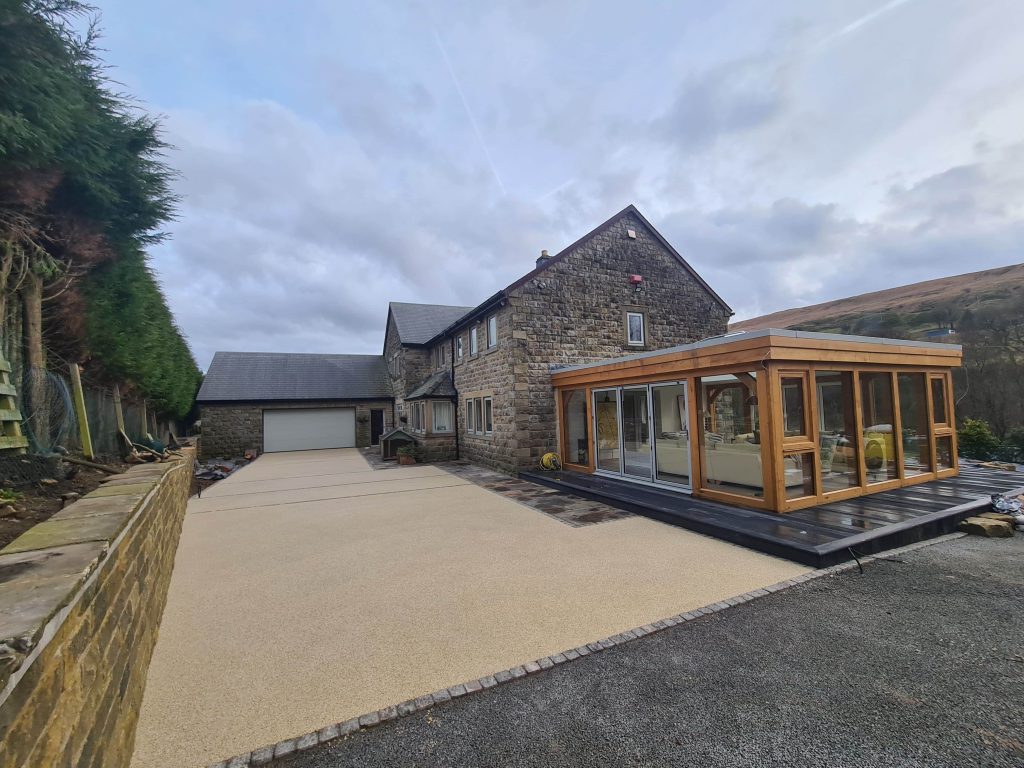
If you’ve been contemplating a driveway refresh, then look no further than resin bound surfacing. Seamless, low-maintenance and slip-resistant, a resin bound driveway is not only safe and fuss-free, but it also creates a stunning entrance to your home or business.
While opting for a resin bound driveway installation may therefore seem like a no-brainer, you might have some reservations regarding the installation process. From how long it takes to lay a resin bound driveway to the degree of preparation required beforehand, there are plenty of questions you’ll need answering before you can undertake a project like this. This is why we always recommend doing your research first.
Below, we answer a wide range of questions on how to lay resin driveways to help you make the best decision for your residential or commercial property. Regardless of whether you want to find out how thick the layer of resin should be or what material makes the best base for this type of driveway, we’ve done all the time-consuming legwork for you!
What’s the difference between resin bound and resin bonded driveways?
If you’re interested in both resin bound and resin bonded driveway installation, then you may be wondering what the difference is between these two types of driveways. Put simply, the process of creating resin bonded driveways (also known as scatter coating) involves spreading resin across the surface and then scattering loose stone/aggregates on top. This creates a rough finish and a non-permeable surface.
You might be wondering what is a resin bound driveway. Resin bound driveways, on the other hand, are porous, permeable and are laid using a combination of resin and stone that’s mixed together first and then patted down into place. While the materials remain the same, there are some key differences in the method, finish/appearance and permeability, making the benefits and the installation process for each surfacing solution different.
To find out which is right for the exterior of your property, please don’t hesitate to get in touch and discuss your paving requirements with a knowledgeable and friendly member of our team. Thanks to years of invaluable experience in this industry, we even offer free, no-obligation quotes, too! For more information regarding the installation of resin bound driveways, carry on reading!
How do you prepare the ground for a resin driveway?
Before you can begin to lay a resin bound driveway, you’ll need to properly prepare the ground underneath. The degree of preparation your driveway will need to undergo before resin can be laid will depend on the current condition and type of driveway that your property possesses.
If your driveway is currently made from concrete that is covered in cracks, this material will need to be dug up and removed first. It should then be replaced with a new, intact base. Similarly, cracked or crumbling tarmac surfaces should also be removed and replaced with a new, level base before attempting to cover it with a surface of resin.
If there are some areas of your driveway that are laid with concrete and some areas of gravel patches, then a new base will be required in this instance, too. Alternatively, if your driveway is made up of block paving or paving slabs, then these slabs will need to be taken up and replaced with a new base as they lack stability.
If one of these driveway examples applies to your property and you need to replace your current driveway with a more suitable base for resin-bound surfacing, we can help. Below, we explore the various surfaces that resin bound driveways can be installed upon and, more importantly, the bases that resin bound surfacing should definitely not be laid on top of.
What can resin bound surfacing be laid on?
Now you know how to prepare the ground for a resin bound driveway, let’s find the perfect base! Firstly, you should avoid any kind of granular sub-base which includes MOT type 1 stone, soil, grass, sand and gravel. This is because a resin bound driveway needs to be installed upon an incredibly stable base. If this base is unstable and shifts, you’re likely to see cracking in the resin surface.
No matter how compacted you make the stones, sand or gravel, none of these base materials make a suitably stable base for a resin bound driveway. The best bases for resin bound driveways include concrete, asphalt/macadam/bitumen and tarmac. If your driveway is currently laid with one of these materials, then you should check it for cracks, contamination and any other damage that could compromise the foundation before laying the resin mixture on top.
What base do you need for a resin driveway?
As the surface of a resin bound driveway is porous (and therefore allows water to percolate through the membrane), the base beneath should also allow water to flow through in order to create an adequate drainage system. This is why porous surfaces like concrete (yes, concrete is porous), tarmac and asphalt all make great bases for a resin bound driveway.
However, if you’re laying a fresh base prior to laying resin on top of the surface, then you must allow the sub-base enough time to cure first. These newly laid surfaces should be allowed to oxidise and weather, but for how long? If you’re creating a base of asphalt, then seven days is best. For concrete, we suggest waiting for a minimum of 28 days.
How thick do you lay resin driveways?
While you may not think that the thickness of the resin layer matters, it does. The thickness of the resin layer also differs depending on whether you’re installing a resin bonded driveway or a resin bounded driveway. For a resin bonded driveway, for example, you only need a very thin layer of resin topped with a layer of aggregate that should be at least 5mm thick.
A resin bounded driveway, on the other hand, should be at least 15mm thick according to industry recommendations – three times thicker than the largest grade of stone which is typically 5mm thick. As a result, many resin bound driveways feature a substantial layer of resin between 15-25mm thick.
The process of laying a resin bound driveway
Luckily, resin bound driveways are also compliant with SUDS (Sustainable Urban Drainage System) regulations which means you won’t need planning permission to install a resin driveway. Therefore, you only need to prepare the ground and install a suitable base (as explained above in further detail).
Then, you can pick the aggregate colour of your choice and begin to mix and lay the resin bound surfacing solution. For DIY-fanatics and those considering updating their driveway with a touch of resin, we take a look at the full process of laying a resin bound driveway below.
Preparation
Before you can dive straight into laying your resin bound driveway, you’ll need to thoroughly prepare the area as once the resin has been mixed, it will begin to cure after just 10-15 minutes. To do this, you’ll need to ensure that the base has been swept and cleared of any dust or debris. It’s also a good idea to mark out a grid of even sections onto the base using chalk or a marker to help you to apply an even layer of the resin mixture.
Aggregate colour
As well as a choice of aggregate size, many resin bound driveways suppliers will also offer a choice of vibrant and fade-resistant aggregate colours to ensure your driveway complements the age and character of your property. For a clean and contemporary appearance, you may want to consider a slate grey aggregate mixture.
Alternatively, there are also plenty of aggregate colours with red and orange tones to add instant warmth to your outdoor space. Once you’ve settled on the right colour you’re your resin driveway, you should ensure that your purchase enough aggregate and resin to cover the entirety of the pre-marked driveway area. This will help to achieve a seamless finish.
Creating the resin mixture
Driveway resin will come in two parts – part A and part B. To activate the resin, you’ll need to combine these parts together until they’ve been thoroughly mixed. Once combined, you can begin to add the dried aggregate until the stones are completely coated in the resin and have a wet appearance. To ensure you’ve properly mixed these components together, we recommend investing in a paddle mixer.
Application
The aggregate/resin mixture is best applied using a trowel and consistent pressure to neatly compact the aggregate mixture into the pre-marked driveway area. Using minimal strokes, the mixture should be manipulated into place until it starts to feel more solid. Each section of aggregate mixture should be left with rough edges to ensure a seamless blend with the next section. This layer should then be levelled, smoothed and polished to create an exquisite, seamless-looking finish.
Curing period
Often it’ll only take around eight hours until the surface is fully cured and can be walked on. However, you will need to wait for a period of at least 48 hours until you can park vehicles on the newly-installed resin bound driveway due to their more substantial weight.
How long does it take to lay a resin driveway?
The length of time it takes to install a resin driveway (once the base has been prepared and cleared of any debris) will depend on the size of the driveway and will, of course, be subject to weather conditions. If you choose to install a resin driveway on a rainy day and water soaks into the resin before it’s cured, the surface will be tainted with white patches and the installation will be unsuccessful.
Similarly, industry experts also recommend that resin bound driveways should not be installed in temperatures below 5°c due to the extended amount of time it takes resin to cure in cooler weather. Generally, however (if the weather is on your side), many resin bound driveways can be installed in as little as two to three days – especially if you choose to employ a resin bound surfacing specialist to create your dream driveway.
Resin driveways at Impress Paving
For a professional and affordable resin driveway installation in the Yorkshire area, look no further than Impress Paving. Also servicing homes and businesses as far as Greater Manchester and Cheshire, our reliable and experienced team of resin bound driveway installers are experts at laying resin driveway.
Being based in the centre of Huddersfield, our expert pavers can travel to a wide range of locations across North West England, so please don’t hesitate to get in touch to discover how we can improve the exterior of your property. Regardless of whether your desire for a new resin driveway is due to the practical or aesthetic benefits, our well-equipped team can help to create the perfect driveway for your property.
To find out more about how we can transform your driveway, please get in touch with a member of our team today! You can either call us on 0800 783 7958 or use our online contact form to send us an enquiry. Highly-experienced at laying a variety of paving solutions for both residential and commercial properties, please don’t hesitate to contact us!